In this blogpost I shall describe how you add an extra data disk to your Linux VM running on Azure.
Step 1 Add a new disk to your Linux VM using the Azure Portal
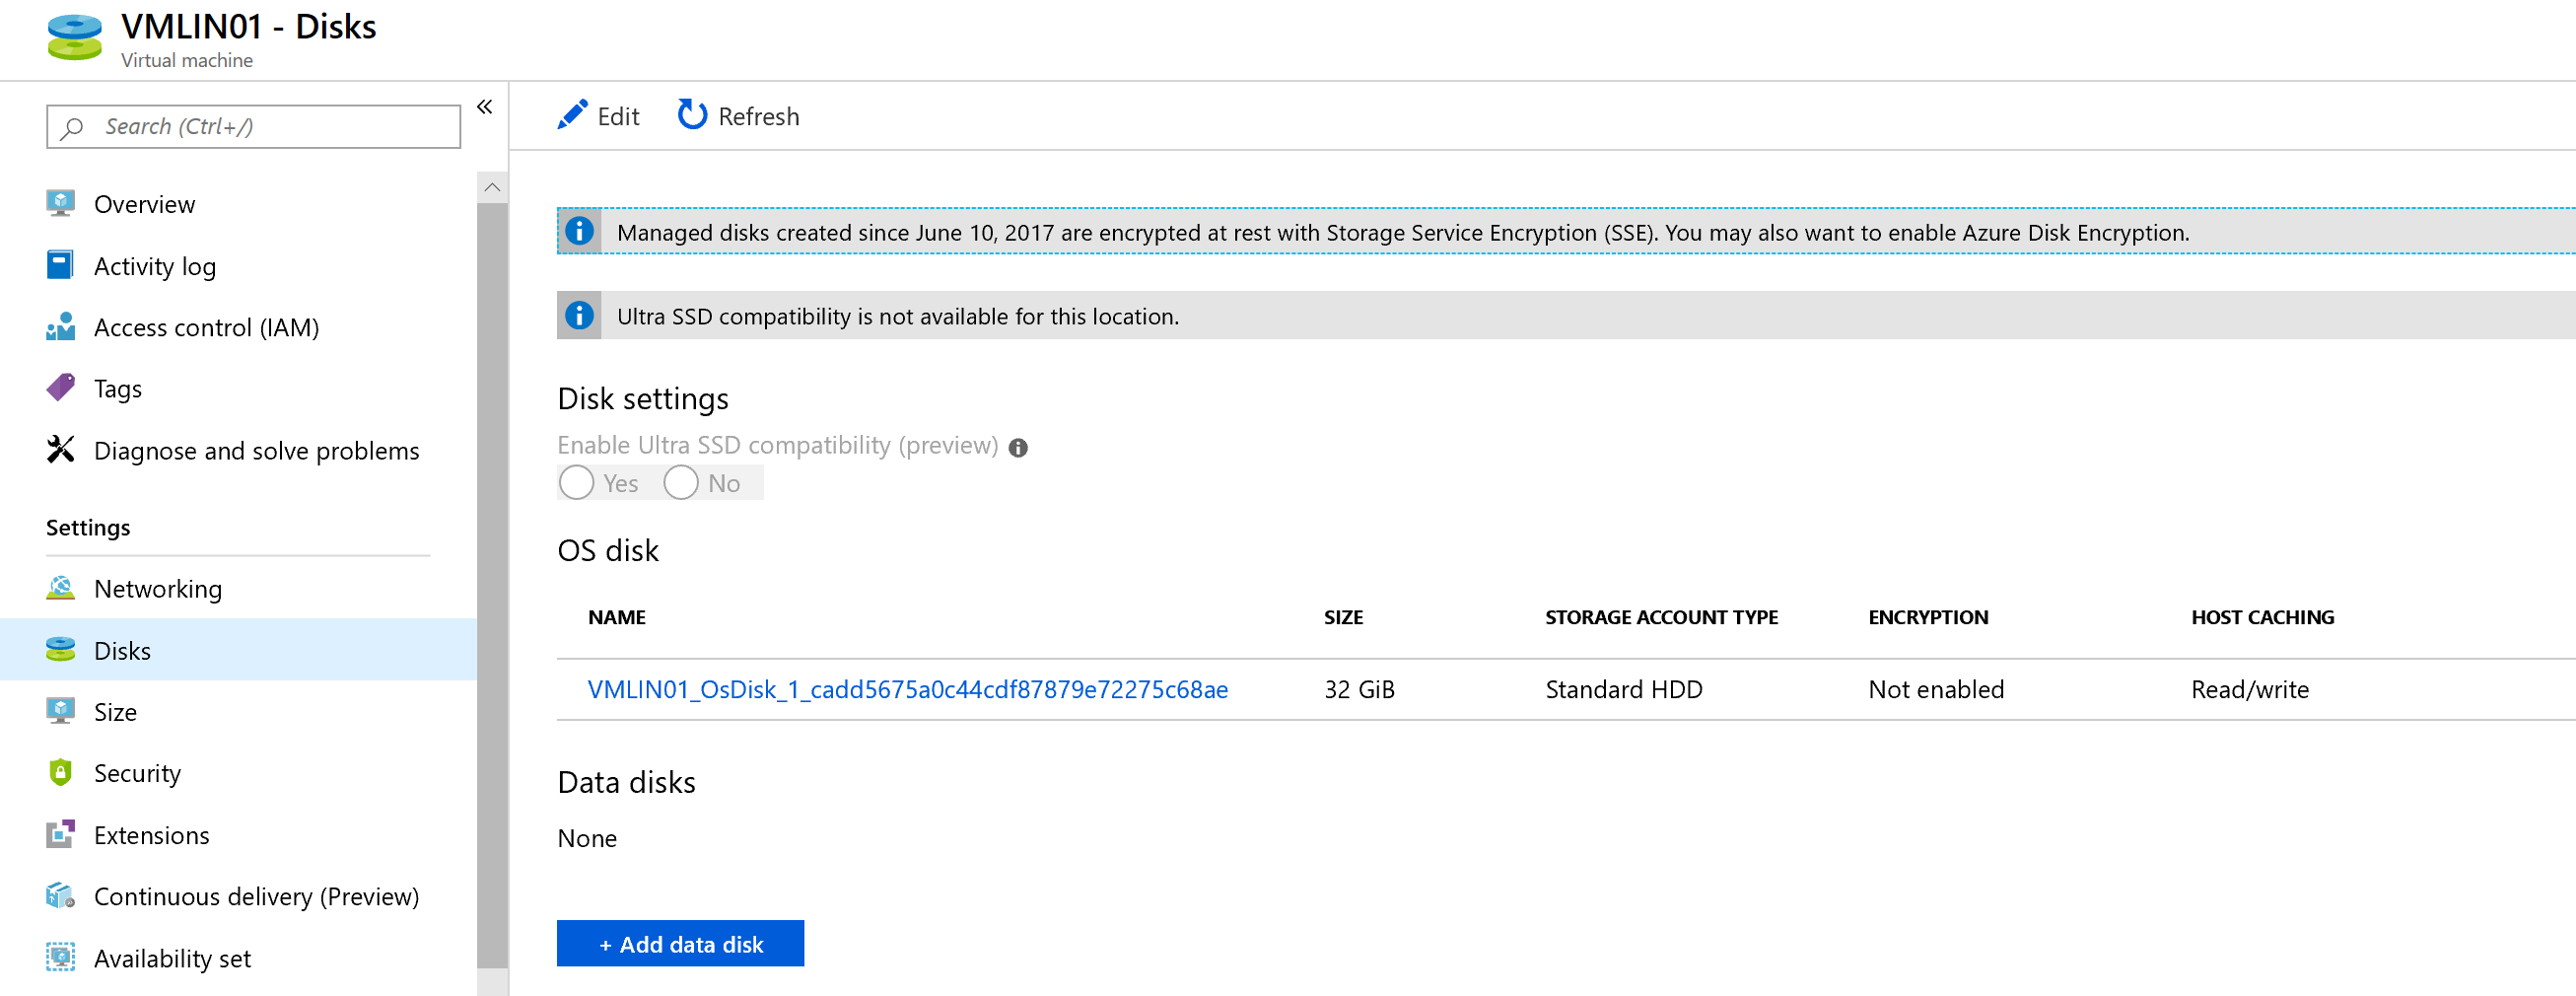
Choose Add data disk to add an extra data disk and choose create data disk.

For demo purposes I quickly entered a default 20 GiB HD, nothing fancy 🙂
Don’t forget to save your changes!

Step 2 Connect to your VM using SSH or use the Serial console on your VM Pane in the Azure Portal

Use the following command to find all your data drives :
|
1 |
dmesg | grep SCSI |
You see all your drives and the newly created drive

Here, sdc is the newly added disk. Let’s continue.
Now we have to partition the added disk using the following command :
|
1 |
sudo fdisk /dev/sdc |
Use the n command to add a new partition. In this example, we also choose p for a primary partition and accept the rest of the default values. The output will be similar to the following example:

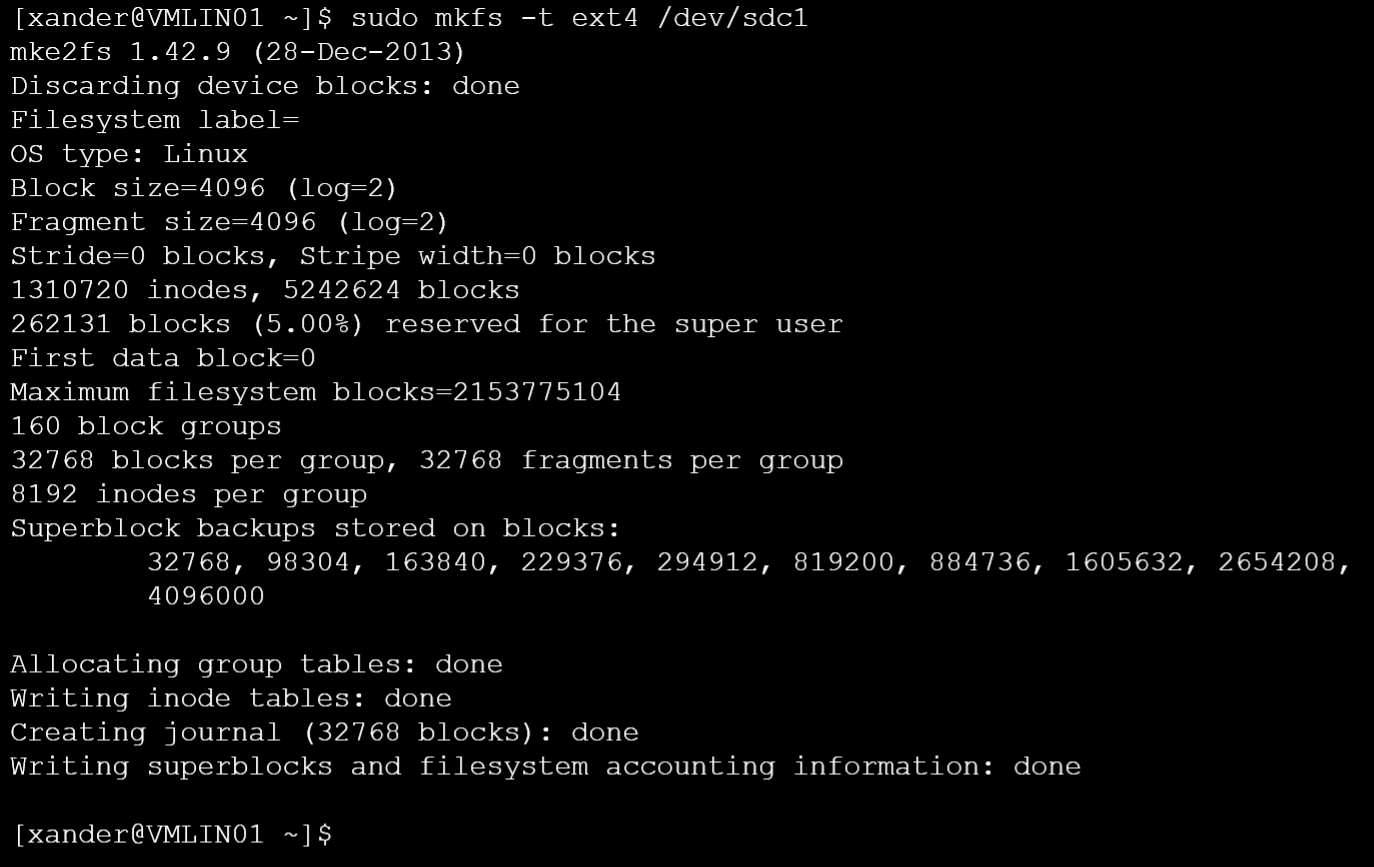
Now we are going to write a partition (format) the newly added disk using the following command :
|
1 |
sudo mkfs -t ext4 /dev/sdc1 |
Now we are going to mount the formatted drive using the following commands :
|
1 |
sudo mkdir /MyDataDrive |
|
1 |
sudo mount /dev/sdc1 /MyDataDrive |

You see your newly created disk :

To ensure that the drive is remounted automatically after a reboot, it must be added to the /etc/fstab file. Herefore I’m going to use the blkid utility:
|
1 |
sudo blkid |

Now copy the UUID :

Now we are going to add the UUID to the /etc/fstab. You can use VI or (like I prefer to use) nano.
|
1 |
sudo nano /etc/fstab |
The format is als follows :
UUID=<YourUUID> /<YourMountPoint> ext4 defaults,nofail 1 2
In my case it looks as follows :

Ok, let’s reboot the VM and check if the drive still exists..
|
1 |
sudo reboot |
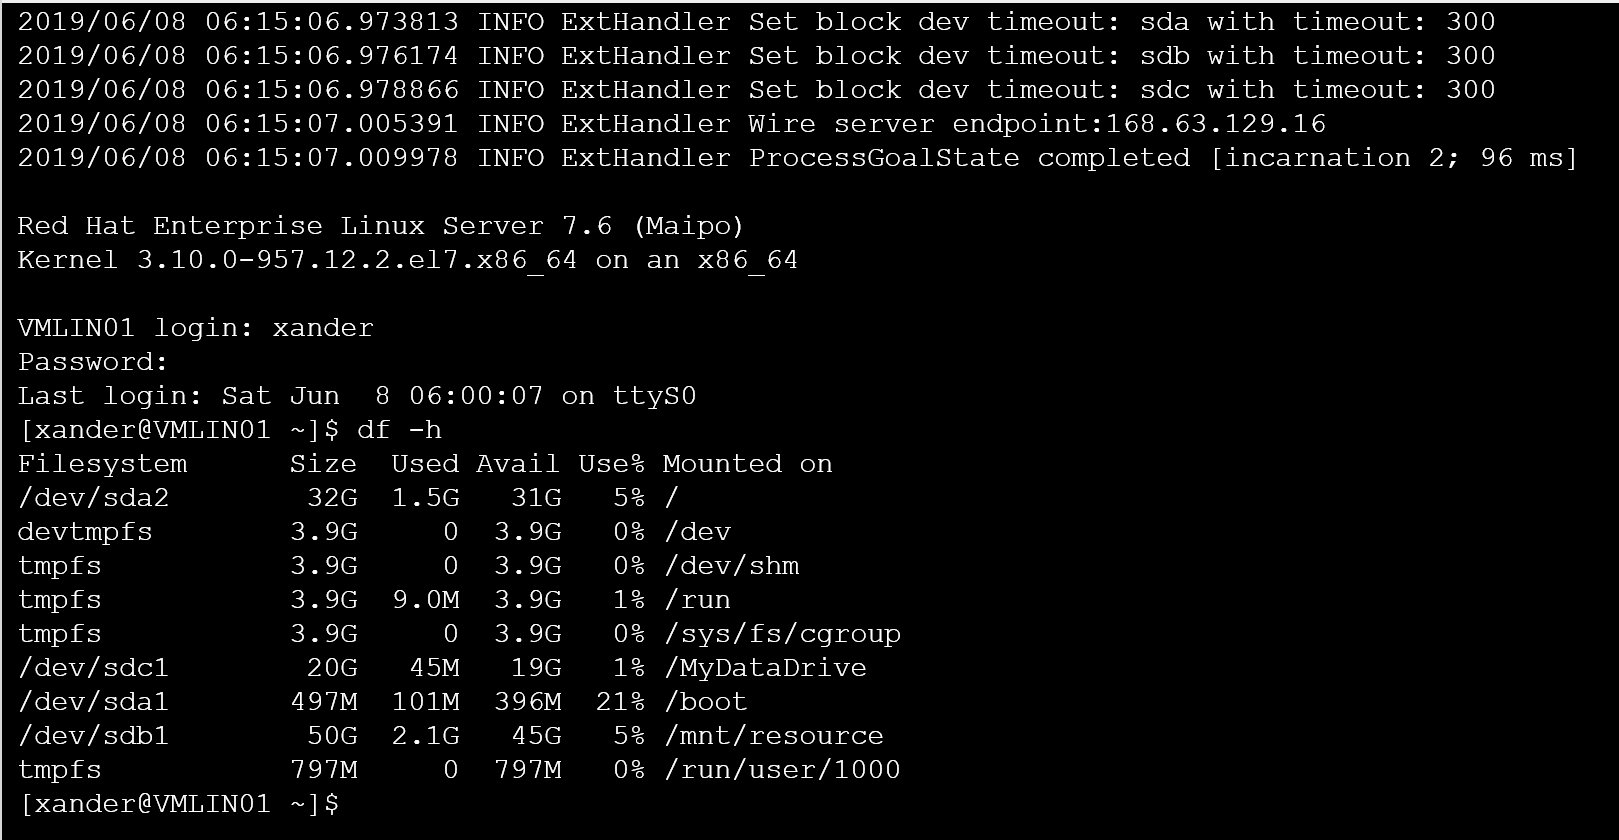
Use the following command to check
|
1 |
df -h |
As you can see the /MyDataDrive is still available after reboot.